Feature guide
Trigger Capture
Save sampled readings from before and after a selected event.
Find it: Machine > Diagnostics > Trigger Capture
Prepare the capture
Add the relevant tags to a group on the machine, then choose Trigger Capture. Set the time before and after the trigger and add a trigger rule. Choose a tag, event condition and any required numeric threshold. Read the preview sentence before saving.
Arm and trigger
Arm means begin watching for an enabled trigger. Triggers respond to transitions or crossings, not simply a value already being wrong. Keep LScope connected and in the foreground. Trigger Now manually starts the event while armed; Disarm stops waiting. None of these controls changes controller logic.
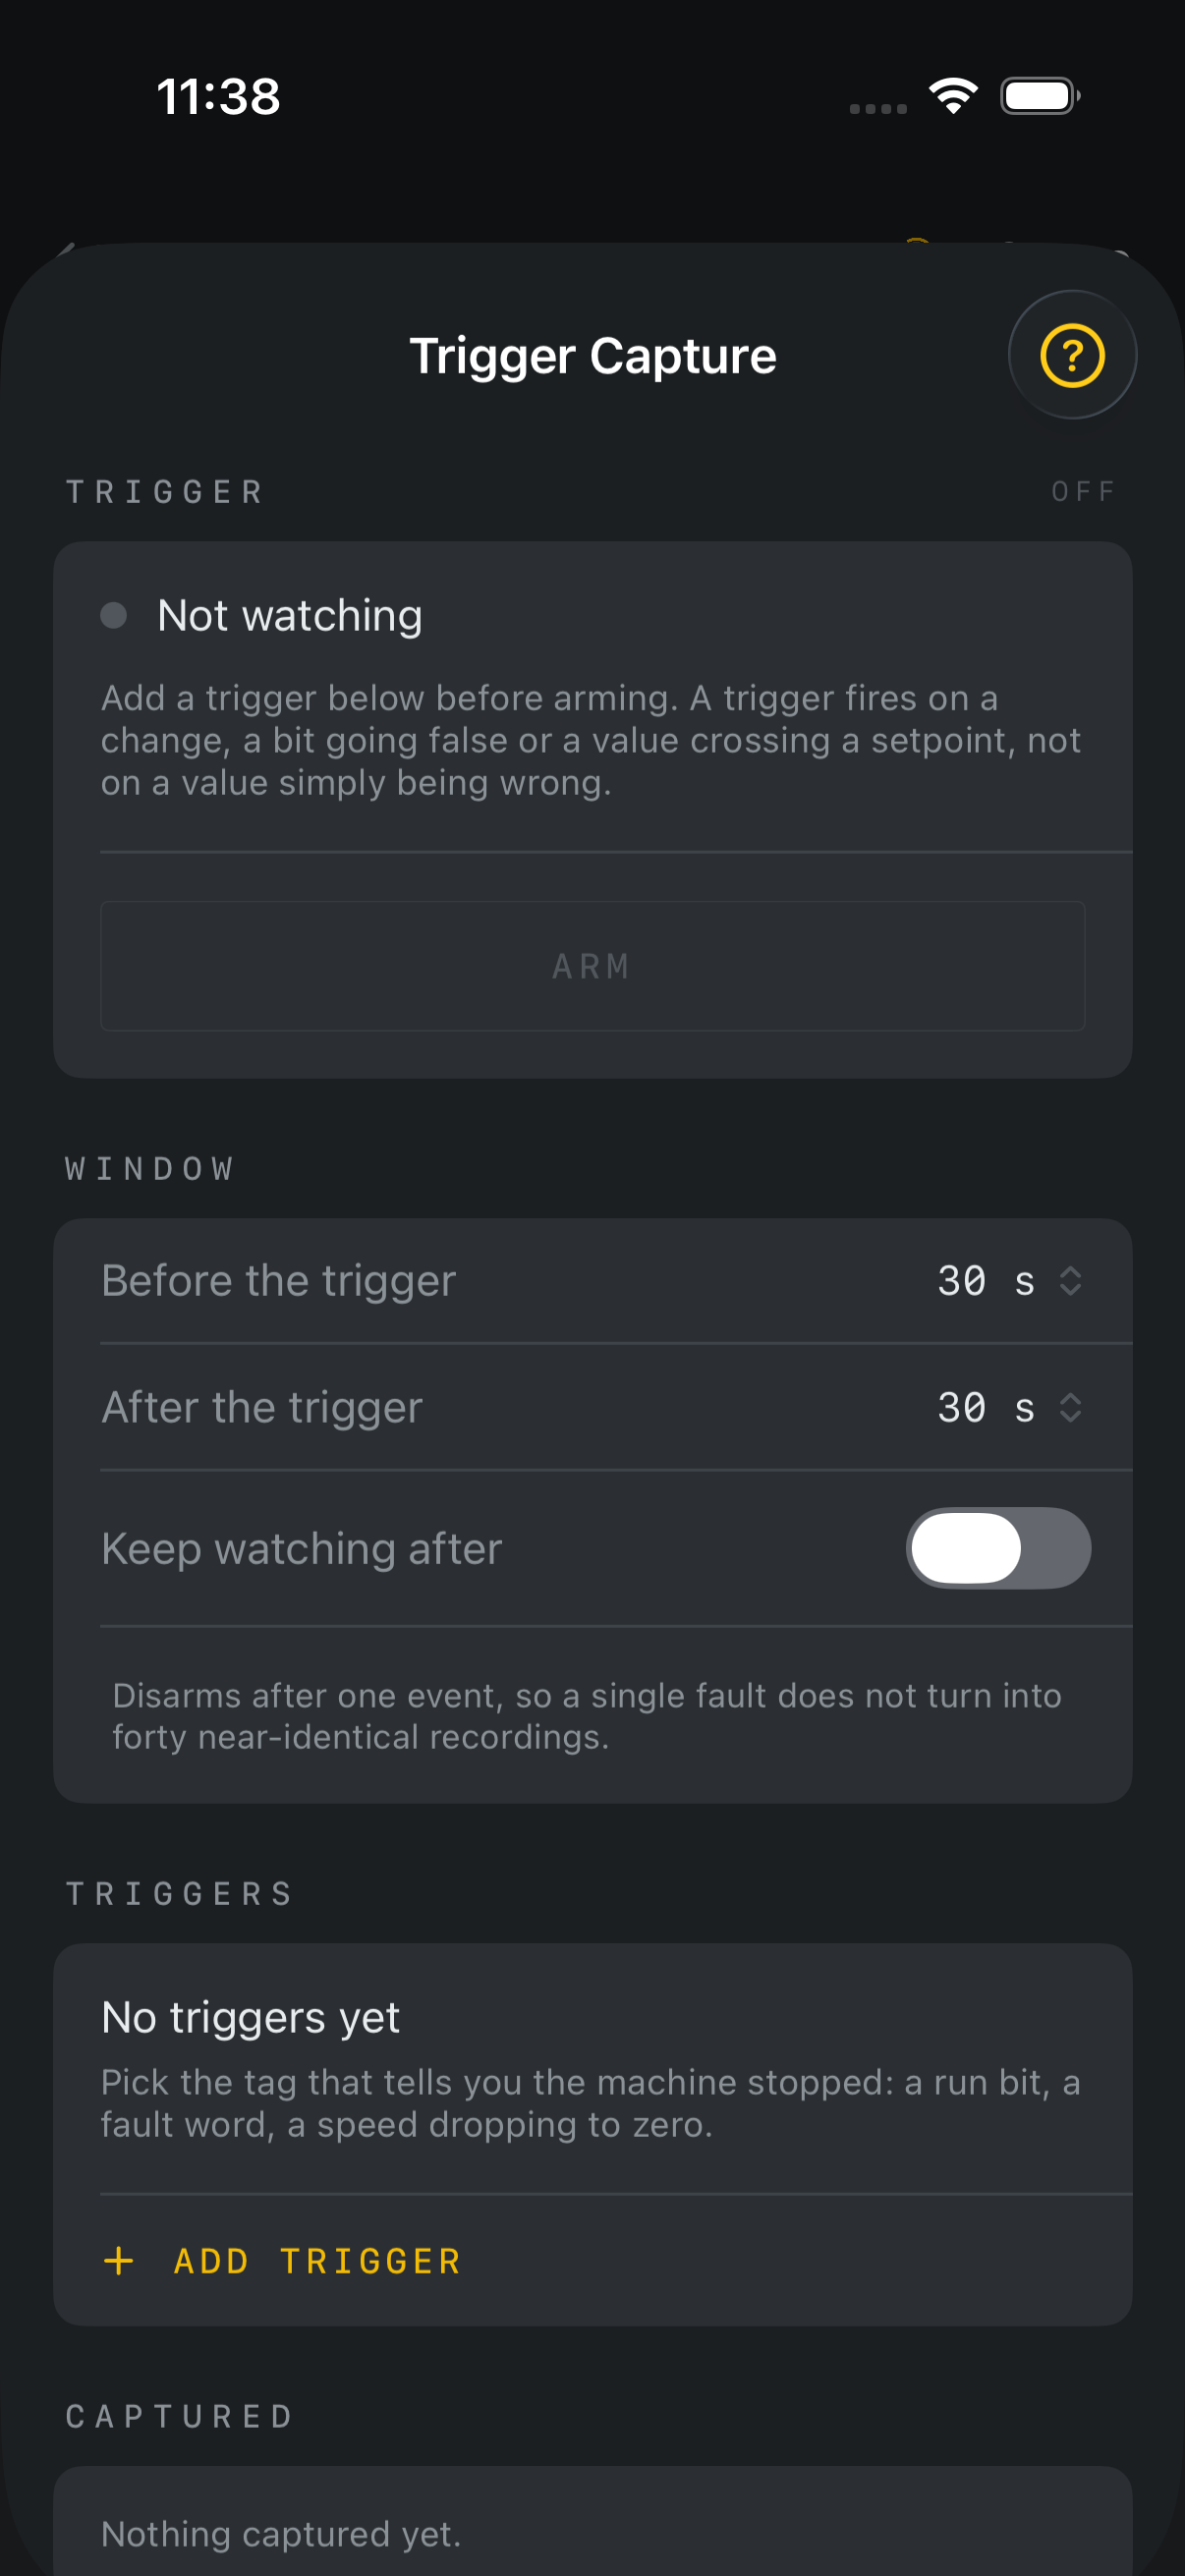
Wait for recording to finish
After a trigger, LScope continues recording the configured time after it. Remain connected until the capture finishes. Arming immediately before an event may leave less history than requested; the review reports the available pre-trigger history.
Review the recording
Open a saved capture to inspect the lanes and trigger time. Tap to inspect observed values. The trigger line is a reference point, not proof of controller scan timing. Missing samples remain gaps. Add context and export CSV or a report as offered.
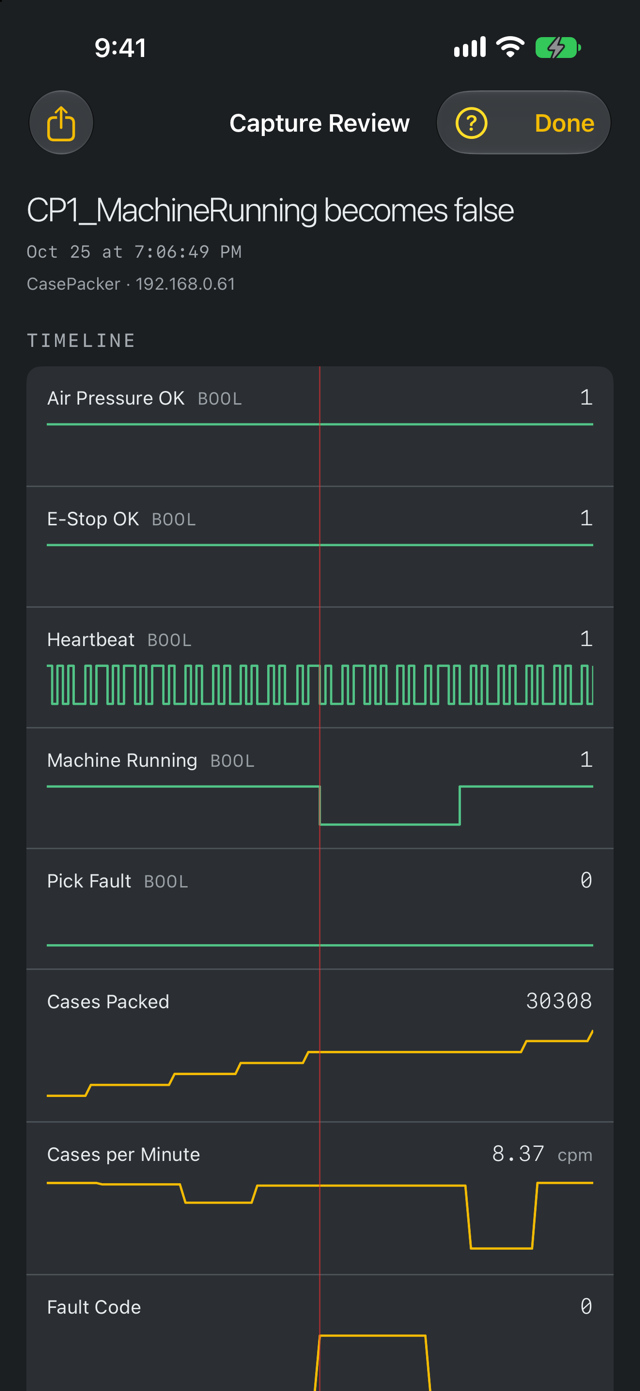
If nothing is captured
Confirm that at least one usable rule is enabled, the selected tag is being read and the expected transition occurs after arming. If the condition was already true, a crossing-based rule may not trigger until a new transition. Review any storage errors before assuming a recording was saved.
Saved data versus setup
Recorded captures are separate from their trigger configuration. Trigger rules and the time window are saved for each machine and included in .lscope setup files. Do not assume exporting .lscope transfers capture history.